Setting up an OCI Health Check in 5 Minutes
Today we are going to go over one of the quickest ways to start monitoring with OCI Observability and Management. We are going to use OCI Monitor. Using OCI Monitor we can set up a health check on all of our servers and have it send us an email when one of our servers is no longer accessible.
First we are going to want to set up an email notification subscription. To do this, let’s navigate to the Notifications service by clicking the hamburger menu, going to Developer Services and then clicking Notifications under Application Integration.
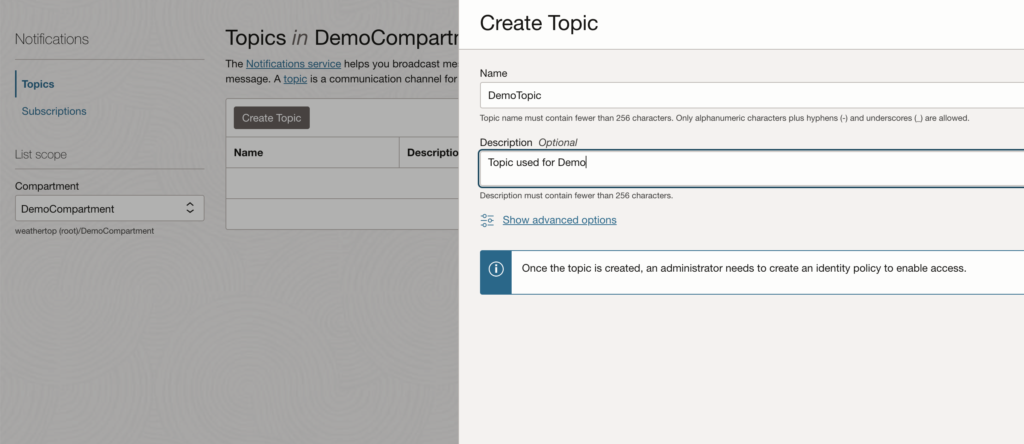
On this page we’ll want to choose our compartment on the right and click Create Topic. Give it a name and description and click Create. Once your topic is created, click the new link with the topic name. From here, we will create a subscription that will send the notification to our email. Click Create Subscription and choose how you want to be alerted. In our use-case we’ll select email and enter our email address. Once you click Create you will get an email to confirm your subscription. Do that to activate your subscription.
Next we are going to create the Health Check. Using the hamburger menu again, navigate to Observability and Management and click Health Checks under Monitoring. Make sure you are still in the same Compartment as the email subscription you created and click Create Health Check. Give it a name, choose which target you want to monitor (in this case I chose a demo OCI instance), the vantage point (or where you want the ping to come from) and the type (HTTP or Ping). Once you have selected your options, click Create Health Check.
This should bring you straight into the new Health Check. Now just need to link our notification service to our health check via an alert. To do this click on Metrics on the menu on the left. You should see a metric called “Ping Test Successful Rate” and a dropdown labeled Options. Click that dropdown and choose Create an Alarm on this Query.
This page will have a lot of options, but minimally we need to do the following:
- Give the Alert a name
- Under Trigger Rule 1, change the operator from Greater Than to Less Than so that it alerts when it’s a 0
- Under Define alarm notifications select choose notifications, your compartment and your topic
- Make sure Enable Alarm? is checked
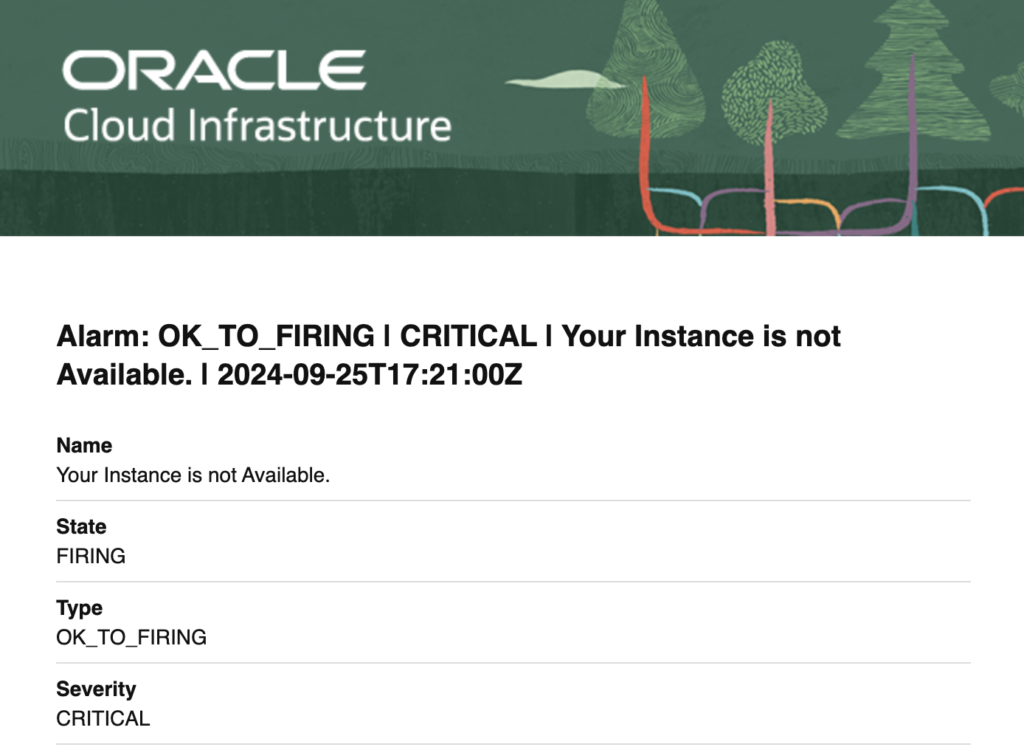
Once these things are set, your alarm should be enabled. The screenshot below is an example of what it looks like when the alarm fires.
I hope this helps you get started monitoring with OCI O&M. If you have any questions or would like help setting up monitoring in O&M please reach out to our team here!